Friday, March 22, 2013

Pure Madness

The Madness that is of March. The Madness that is watching hours of college males' ability (or not) to throw an orange rubbery ball up into the air and hope it goes through a rimmed net. The Madness of risking our bums being stuck to the leather couch after hours of flipping between 4 different channels of games. The Madness of cheering for a team when you could care less about them every other 364 days of the year except that NOW your bracket depends on them.

Yes, this is the NCAA Men's Basketball Tournament, or more commonly known as March Madness. And yes, I am watching it.

My husband is VERY into basketball. He played in high school and now he coaches a high school boys varsity team. He LOVES March Madness. And, since I love him, I pretend to love it too.

But seriously, I do enjoy the time with him and cheering with or against him depending on the game!


Last year was my first experience. I made a bracket. No, I didn't choose teams based on mascots or jersey colors. That's just silly. I used a logical method. I chose all the teams with "state" in their name to win. :) Needless to say, I had a method to my madness and it paid off...I won! My  bracket beat my husband's and he owed me dinner at Applebee's!


But that was last year and this is now. After 8 months of marriage and (7 months too many of basketball, haha, just kidding) you might think I would have learned some stuff and picked up some better strategies for my bracket building this year. Well, you would be wrong. I used my same method. Why fix something that ain't broke?

I'm not going to can my method just yet, but the way things are looking now, this may be the last time I use it. My champion is already out and it's only day 2. yikes!

Just like last year, we decided to make a bet. This year, the loser has to wash, clean-out, and vacuum both vehicles! So win or lose, we both get shiny cars!

Tonight I did not feel like cooking so I ran to grab one of these:


We devoured it! Yes, it might seem like we're being couch bums, and we kinda are. But hey, it's part of the Madness. And actually, I am a very good multi-tasker. Today, I did a very successful and cute DIY craft (which I will blog about tomorrow!) and also plan to get all my report cards and student portfolios organized and ready for conferences while we watch tomorrow.

Did you make a bracket? Has your bracket been busted?

Happy March Madness!

Tuesday, March 19, 2013

Preheat to 425

~How often do two things that you want to make for dinner both have to bake in the oven? Maybe once a month for me based on the types of meals I currently have in my repertoire.

~How often does that make you wish you had two ovens OR a convection oven? Every time! But...won't be too long before I have a convection oven :)

~How often do your two dinner items need to be baked at the SAME temperature and the problem is solved? Very rarely...tonight is an exception! So preheat to 425 and get ready for two yummy dishes.

I didn't menu plan for this week. I really should just do it every week. It makes my decision making so much easier. Oh well. Thank goodness for Pinterest right? :) I knew I had frozen chicken tenders and decided to look for an easy, tasty, baked recipe for chicken--one that also did not require me to buy any of the ingredients. I'm picky, I know. But Pinterest came through (as if often does) and I found one! The original source was from All Recipes.com for Garlic Chicken. Sounded good, looked easy, AND I had all the ingredients, good to go.

I needed something to go with the chicken. Now maybe you don't think this was the best pairing, and if I was on a Food Network competition, I would choose something different too, BUT, I saw these pesto scones first on Pinterest and knew I really wanted to try them. So there you have it. Or, if you think I'm weird for making chicken and scones, you don't have to have it. :)

Either way, it's what's for dinner tonight!

My husband offered to take pictures for me tonight so that I could focus on the cooking and not have to wash my hands twice as many times to grab my camera. I think he had fun with it...he took a lot of pictures!

As soon as I decided to make this, I defrosted 6 chicken tenders. My de-frost method is to put the meat into a Ziploc bag and then float it in a shallow pan half-filled with cold water.


Technically, one of the recipes called for an ingredient I did not have, 
but thankfully, it is one you can make yourself: buttermilk. 
1 cup of milk and 1T of vinegar sitting for at least 10 minutes works as a substitute.

Here are (most of) the ingredients for the garlic chicken: EVOO, garlic, and bread crumbs.

Put 1/4 C EVOO in a shallow dish and add the garlic. 
The recipe called for 2t, I did about 6 cloves and will use more next time. I love garlic.

Warm this up a little bit. I did about 20 seconds in the microwave.

 1/4 C breadcrumbs and 1/4 C of grated Parmesan cheese mixed together in a second shallow dish. 
(I only used about 1/8 of cheese since we both have a dairy intolerance and avoid using very much)

Coat each piece of chicken in EVOO/garlic


Then the breadcrumbs/cheese

Lay the chicken in a shallow baking dish
 Bake for 30-35 minutes or until the pink is gone and juice run clear.

Once I popped the chicken in the oven, I got started on the pesto scones, mmmmm
In a mixing bowl, add 3 1/4 C flour

 1 T sugar
1/2 t salt
 

1/2 t baking soda
2 1/2 t baking powder
 1/4 t pepper


Add the 1 C buttermilk

 1/4 C pesto (next time I would probably add more)

3/4 C butter cut into pieces

Mix it all together into a dough.

Then prepare a floured cutting board.


Knead the dough a little bit.

Form it into a circle

Cut into 8 triangles (these were pretty filling so next time I would make them smaller)


 I always use Parchment Paper for baking. I added them to the oven for the last 10 minutes of my chicken baking. Maybe it's because I don't have a convection oven, but I had to leave both the chicken and scones in for another 5 minutes. The chicken could have probably come out after 30 min, but I wanted it to be nice and hot so kept it in while the scones finished.

I cooked up some green beans as well and it turned out to be a delicious and filling meal!

Again, maybe not the best pairing--scones and chicken. But hey, it was fun to try two new recipes and both were yummy! Thanks to Rachel Schultz for the Pesto scones recipe.

Next time:
~I would add more garlic and probably use chicken breasts for a bigger piece of meat.
~I would add more pesto and make the scones smaller.

I can see serving these scones with a brunch! I actually created a possible brunch menu around these scones...hmm...now I just need a reason to execute it! Easter maybe?

Let me know if you try either of these recipes. What do you think?

Monday, March 11, 2013

Homemade Hummus

Hummus is one of my favorite dips. I use it for veggies, chips, and as a spread on turkey sandwiches. YUM! Bonus: it's cheap and easy to make.


Drain and rinse 1 can of garbanzo beans (chick peas)


I always roll my lemon a couple times while slightly 
pushing down--a trick I learned from Rachel Ray "to get the juices flowing."

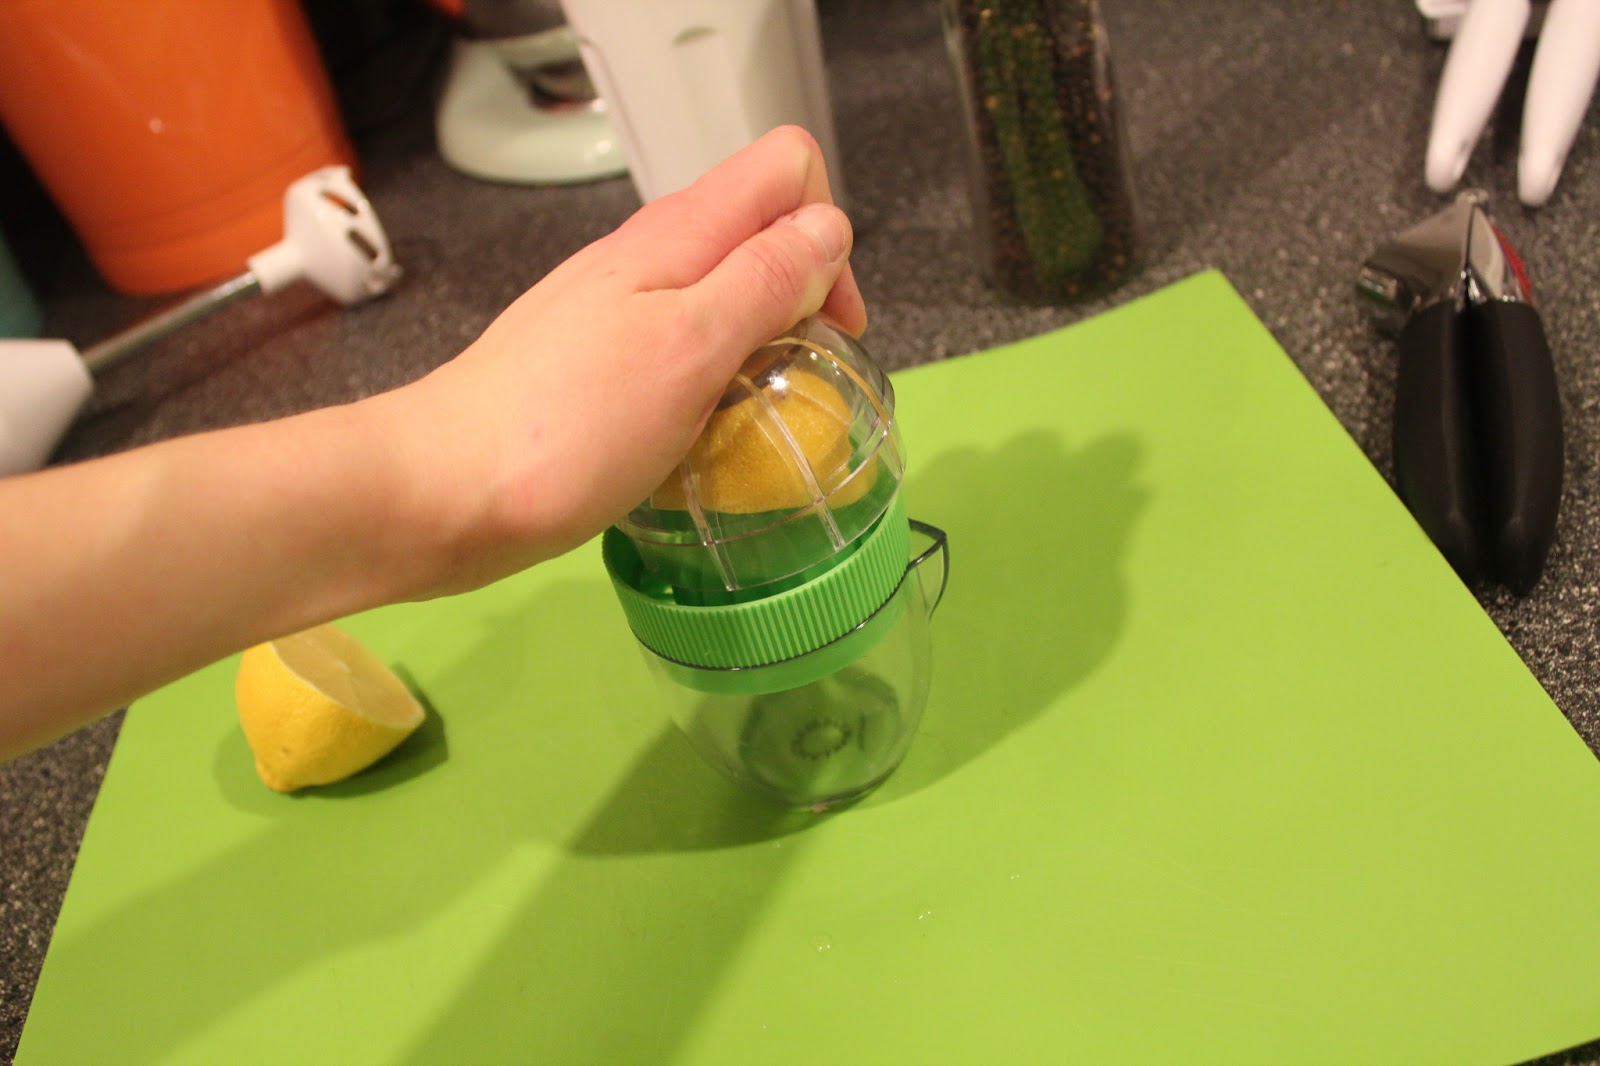
Squeeze the juice of half a lemon. I love this lemon juicer. So worth the $5. It has a strainer, squeezing cap, pouring spout, and is a measuring cup. That Martha, she's a genius.

Another one of my favorite kitchen tools--my OXO garlic press.


Crush 5 cloves of garlic, or 6, or 7. In my opinion there's no such thing as too much garlic :)

Add some fresh ground pepper.

I don't have a food processor so I use my immersion hand blender. It works great!

Add a little bit of cold water at a time as needed to reach the right consistency. With an immersion blender, you need to add some right away to help get it going.

This makes enough for me to have it for two lunches on all my veggies! Let me know if you try it and how you like it!

I linked up to the following party:


Photobucket

Titus 2 Tuesday

Spring Mantel

Soooo nice to blog again! I don't know how full-time Kindergarten teachers (2 half-day sessions that is) ever find time to blog! Let's just say I am glad to be back to half-day again :)

This past Friday, my mom came into town so that we could go to the Grand Opening of our new JoAnn's store together. HOORAY! We were content with the previous one but would have to go 30 min away to a bigger city for some products that our store did not carry. But no more. Our new store is bigger, better, and filled with so many great things that will keep us crafty and happy.

Using coupons and teacher discount, I bought some fun things and was then inspired to craft. Last weekend I put away the winter and Valentine's decor so everything was looking bare. Craft supplies + bare flat surfaces = new season decor!

Below are pictures, links to my inspiration, directions, and tips for everything I made yesterday!

I decided to start first with my little chalkboard. I was browsing my Craft board on Pinterest and saw a pin that immediately inspired me with what I would draw. My pin took me to a blog called i heart prints and patterns and I picked 3 of her cute trees to draw. If I had decided to draw trees on my own, they would have all looked the same and not very cute. So thankful for other people's creativity that I can copy. :) (my hubby was quite impressed with the middle tree and kept asking "how did you do that?")

My second project was inspired by a color, which has become my favorite color recently. I found this color contained in spray paint form at JoAnn's and I had to have it! (I used a 50% off coupon of course!)

The color: CORAL
Then I just had to find something to paint. A $1.00 (but only 50 cents for me, yay for coupons) wood birdhouse was the answer. I already had some blue paint that I thought would look great to pair with the coral.

 I used magazine pages and masking tape to cover the front, back, and sides of the birdhouse.

Then I took my little birdhouse outside and spray painted the roof and platform. 
I let it dry overnight and then peeled the paper and tape off.

 Next it was time to paint sides blue.

  My husband told me he loves to see me craft and how it makes me smile.

Ta-da! I love it!
 
Project #3: button art
I have long since wanted to create something with buttons but have not had/found any cute assortment of colors and sizes. New JoAnn's fixed my button dilemma. They had packages of 130 buttons in various color schemes and it was buy 1 get 1 free!!! I chose a pastel spring set and a patriotic set. I had an 8x10 canvas in my craft drawer that had yet been assigned to a cuter purpose so it became the backdrop for my button masterpiece.

I wasn't sure what method I would use to stick the buttons on so I grabbed my Zots, Tacky Glue, and Zig pen so that once I plopped down in front of a movie with my hubby I would not have to get back up. I tested with the Zots first on the back of the canvas. The button stuck very well. Easiest and cleanest option so I didn't even both trying the other two.

I had decided to make a cross for Easter. I tried one arrangement and took a picture. Then I asked my hubby to look at it and give me his expert opinion...he wasn't stoked about it. But...he did offer a better arrangement and a method to line it up perfectly for sticking so I am okay with his original craft criticism. :)

I layed all the buttons down as best I could. Then I used a ruler to line them up and space them out as perfectly as I could. I used a pencil to draw little dots through the button holes. I penciled a whole row at a time then I picked buttons up one at a time, stuck a Zot dot on the back and lined it back up with its pencil dots.
Two things I learned:
1--an 8x10 canvas is not truly 8x10 so my measurements were slightly off gah!
2--projects that require perfection are NOT the reason I do crafts. I am a perfectionist, if I can't do something perfectly that needs to be done perfectly, it stresses me out, therefore I choose crafts that are more forgiving hence I smile and enjoy what I am doing and it's actually an enjoyable outlet. This one was right on the fence so no more like that for me!
It turned out nicely though and I didn't have a craft meltdown (yes, it's happened before)


Final project: paint chip banner made with Silhouette!
I have literally thousands of paint chips (I'll explain later) and wanted to use some (5 did not make a big dent) for a project. I wondered if I could have my Silhouette cut paint chips, so I Bing'ed it. (just not as cool to say as Googled) I found this blog with directions and settings to cut paint chips!
I also copied her banner design. I made a rectangle, double clicked so I could alter the bottom edge and then added two small circle at the top for my baking twine to go through.

Then, I used the free flower that comes with the software (seen at top in image below). However, the petals are all separated and I wanted it to be one piece. In order to do that, I un-grouped the image, moved the petals so they overlapped in the middle, selected them all and clicked weld so that it became a one-piece flower as you can see in the second example.The third flower shows that I double-clicked so that I could manipulate the lines to make it cleaner and nicer looking. The bottom shows my final product!
I added the flower onto the banner. Following the settings from the blog I found, I set my Silhouette to
Speed: 3
Thickness: 33
Blade: 4
I changed my cutting mat dimensions to the same as a paint chip (4"x5") and lined up my image on the right hand side so that I wouldn't get the words of the colors. For some projects, I would want the words to show because they are so fun (sidenote...have you ever thought about the people who's job it is to name paint colors or OPI nail polish? fun right? or maybe hard? anyways...) but for this project I knew the bottom color would get cut off on the banner anyways so I just wanted to avoid and and all words. I tested on a not-so-pretty brown paint chip. It worked great! I chose 5 springy colors and got to cutting. I used the flower banner for 3 of the paint chips. I wanted a second image so that I could alternate. I looked through the Silhouette Online Store and found this cute bird. I downloaded it, and printed it on the other two paint chips. I did make a mirror image for the second one so that the birds would be facing each other on the banner.

3 of my paint chips!
Next time, I would move my image down to fit perfectly in the middle color. I didn't notice how un-centered it was until I was on my last one. 
"Don't you have thousands of paint chips to just do it over?" you might ask
Yes, but ironically I only had 1 yellow and 1 green in these wonderful spring colors so I just went with it. (Again, that whole perfection in crafting thing...I gotta let it go or else I will hate crafting)


After I cut all the paint chips with my Silhouette, I decided I wanted to back the cut-out with a darker color of the same shade just like the lady had down in her blog.


I used my Fiskars paper trimmer to cut the darker color I wanted for each paint chip.

  Then I used my E-Z Runner to put stickies on each side of the color chip.

I lined up the hole with the color card and voila!

Since I used a variety of colors for the banner, I wanted a neutral color for the string so I chose my light brown (can't think of its cute name off the top of my head!). And brown is a spring color anyways...think of all the mud and dirt!


And here are all the pieces put together to make my spring mantel!

What do you think? Have a favorite item? Have tips for me? Questions? How did you decorate for spring! Please comment as I would love to know you read my post!

I've linked up at the following linky parties:


Keeping It Simple
More the Merrier Monday 

Photobucket
five days five ways | feature friday free for all

 
http://cornerstoneconfessions.com/2013/03/t2t-linky-party-42.html

 http://diyshowoff.com/category/other/that-diy-party/