
Sunday, June 30, 2013
Follow me on Bloglovin!
Not only have I updated my URL and email, but now you can also Follow my blog with Bloglovin
Sunday, June 23, 2013
DIY Entryway Table Part 3
You probably thought I would never blog again. And even if I did come back, you probably thought I would never finish that darn entryway table. Well, if you did think those things--think again!
I am back and definitely sad that I have been away for so long. Teaching Kindergarten in the morning and math for 3rd and 4th graders in the afternoon as well as keeping a close eye on our house-in-progress left little time for blogging. But as with all school years, summer comes and there is more time!
We finished the table back in April during a weekend that tricked us into thinking summer weather was here to stay.
In case you forgot, here's a refresher of the not-so-pretty-looking table.You can look at Part 1 and Part 2 to see how we got this far.

Close-up shot in case you thought from the other picture that it was "not too bad".

Beingmy our first DIY wood-refinishing project, we just guessed our way through what to do. Yes, yes, I know there are so many how-to's and directions on Pinterest. But, when your husband suggests spur-of-the-moment to finish it since the weather is nice, it is better to just get up and go while's he's willing to help rather than say, "hold on honey, first we need to do our Pinterest research." And I wasn't too concerned about doing it just right either because again, this table is our funky little creation that we don't intend to keep forever (although we quite possibly might).
So at any rate, we could tell there was some sort of varnish on it and figured we should probably sand the table. Did I get that one right? At least partial credit?
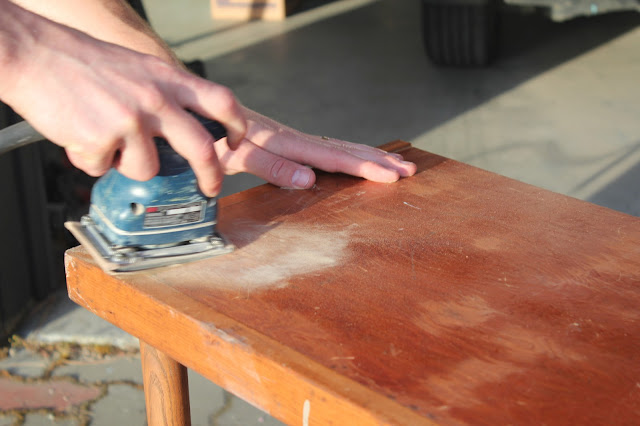
The little hand sander wasn't going to get the job done like we wanted so we pulled out the belt sander.

After getting it all de-varnished and smoothed down, it was time to paint! You can tell by the pictures (in case my own admittance isn't enough) that we are total amateurs...we didn't even own a paint stick so used an actual stick.

I like painting things! I'm no artist by any means but give me a piece of wood and one color and I can get it covered for ya! I am so eager to try a wall (or two or three) in our house eventually despite hubby's unrelenting insistence that painting is "not that fun." Hmmm...maybe he's right but I want to find out for myself.

There she is! We let it dry overnight and put a second coat on the next day. Since I got the paint from Re-Store, I'm not sure what the color is called, but I'm calling it Iced Mint. What do you think? Should I apply for a job to name paint colors or OPI nail polish? Maybe not. But either way, I'm so happy with how our first little project turned out! Now this summer I need to spend some time reading those Pinterest directions so that next time I am prepared.

And I just realized as I was putting pictures up that I totally neglected to take any pictures of the table back in the house with the cute May decor on it. Unfortunately I can't take a picture right now either because we are moving in one week (YAY!!!) so all the decor stuff is packed away. Once we are in the new house and this little Iced Mint table is re-decorated, I will post a picture and then the story will truly be over!
Check back later this week for pictures of our finished house! :)
What was your first DIY wood-finishing project? Did it turn out like you hoped?
I've linked up at the following parties:


The Girl Creative

I am back and definitely sad that I have been away for so long. Teaching Kindergarten in the morning and math for 3rd and 4th graders in the afternoon as well as keeping a close eye on our house-in-progress left little time for blogging. But as with all school years, summer comes and there is more time!
We finished the table back in April during a weekend that tricked us into thinking summer weather was here to stay.
In case you forgot, here's a refresher of the not-so-pretty-looking table.You can look at Part 1 and Part 2 to see how we got this far.

Close-up shot in case you thought from the other picture that it was "not too bad".

Being
So at any rate, we could tell there was some sort of varnish on it and figured we should probably sand the table. Did I get that one right? At least partial credit?

The little hand sander wasn't going to get the job done like we wanted so we pulled out the belt sander.

After getting it all de-varnished and smoothed down, it was time to paint! You can tell by the pictures (in case my own admittance isn't enough) that we are total amateurs...we didn't even own a paint stick so used an actual stick.

I like painting things! I'm no artist by any means but give me a piece of wood and one color and I can get it covered for ya! I am so eager to try a wall (or two or three) in our house eventually despite hubby's unrelenting insistence that painting is "not that fun." Hmmm...maybe he's right but I want to find out for myself.


And I just realized as I was putting pictures up that I totally neglected to take any pictures of the table back in the house with the cute May decor on it. Unfortunately I can't take a picture right now either because we are moving in one week (YAY!!!) so all the decor stuff is packed away. Once we are in the new house and this little Iced Mint table is re-decorated, I will post a picture and then the story will truly be over!
Check back later this week for pictures of our finished house! :)
What was your first DIY wood-finishing project? Did it turn out like you hoped?
I've linked up at the following parties:
The Girl Creative
Subscribe to:
Posts (Atom)